My daughter could last for hours coloring anything with all kinds of colors so we celebrated that for her birthday. The invitation says:
There will be markers and crayons and gloss
and paint and chalk, and even a sponge toss.
We will be outside unless there's rain,
and please wear clothing that you can stain.
(for parents too if you like to play with the kiddos)
We put out tables with coloring sheets with the option of using crayons or colored pencils or markers. We stapled a long white sheet of paper to the fence to let the kids use finger paints or the painting dot markers to color. We also had long sheets of paper for the tables in case a kid wanted to make a mural of their own to take home :) We had out the color chalk bucket which gets used on all surfaces outside daily at our house.
We had a sponge fight with colored water. We used the bath drop colors to color the water because I had read food coloring could stain. We had wax crayons with wet sponges and a mirror for face painting. There was also some hair chalk too but all of the kids who were able to make the party were too young for that.
We had color bubbles if the kids wanted to blow bubbles. Those are very messy which made them extra fun for some of the kids.. Even the water tables, which was the only water toys out, had colored water in them.
The food table had colored slushies on it. I used
this recipe. I used only 1t of the coloring for the mint, coconut, strawberry and orange since I thought the 1-1/2t made those too strong. The bottles were titled in a slightly different way so it might be due to the pure vs artificial flavoring.
The other food was just hotdogs with chips and veggie & fruit/cheese tray. There was also plenty of water because it gets hot here! For dessert, instead of the traditional cupcakes, we had Rice Krispie treats. I traded out a 1/3 of the Rice Krispies for Trix to add color. The kids sang happy birthday, then got to decorate their own treat with writing icing. It made for some messy treats and then some did not get eaten, but they had fun make the art.
The favors were all in different colored totes. Each included crayons with coloring papers, colored glitter glue, a set of watercolors, and a bath color (either bath paint, bath crayons, or bath drops). Hopefully it will all get used up by each kid.
The parents also got a favor. They were told in the invitation to wear clothing that might stain, but since most of it was all washable, we gave them a chance to save the clothing.


 So I did something for the staff on Teacher Appreciation Day because I know they work just as hard as the teachers, just in a different way. They got a wrapped candy bar with this cute printable I had found. I think I cut and pasted to super resize for my candy bars. I also did a different large bar and the original size wrap was perfect. And I also gave a funny moving critter in hopes they can add humor to a stressful day.
 Then we have swim teachers so they got a fish bottle filled with goldfish puffs. I found some bottles I liked but ended up not being shipped because they were out of stock. Then I found some other ones which arrived broken and were returned. The third time was a charm and I dare say the better looking bottles! The tag was a printable I found here.
 And there are some dance teachers as well so they got some shiny totes with candy thrown in there. I've actually only met the instructor once since the class is during school hours before pick up time and I haven't been thrilled with her correspondence so I did not want to work too hard for her appreciation gift but still felt the need to give one.


 Monday: cookie cutters. The label was a simple one I made and reads "Thank you for cutting this cookie into one awesome student."
 Tuesday: oven mitt with goodies. I did not find a printable I liked so I made one up really quick saying the same thing as all the others, "I have to ad-MITT, you're a great teacher." The mitts include a matching oven pad, a knife, scissors, a funnel, and a silicone baking sheet. More stuff for home than for school but could possibly be used in either place.
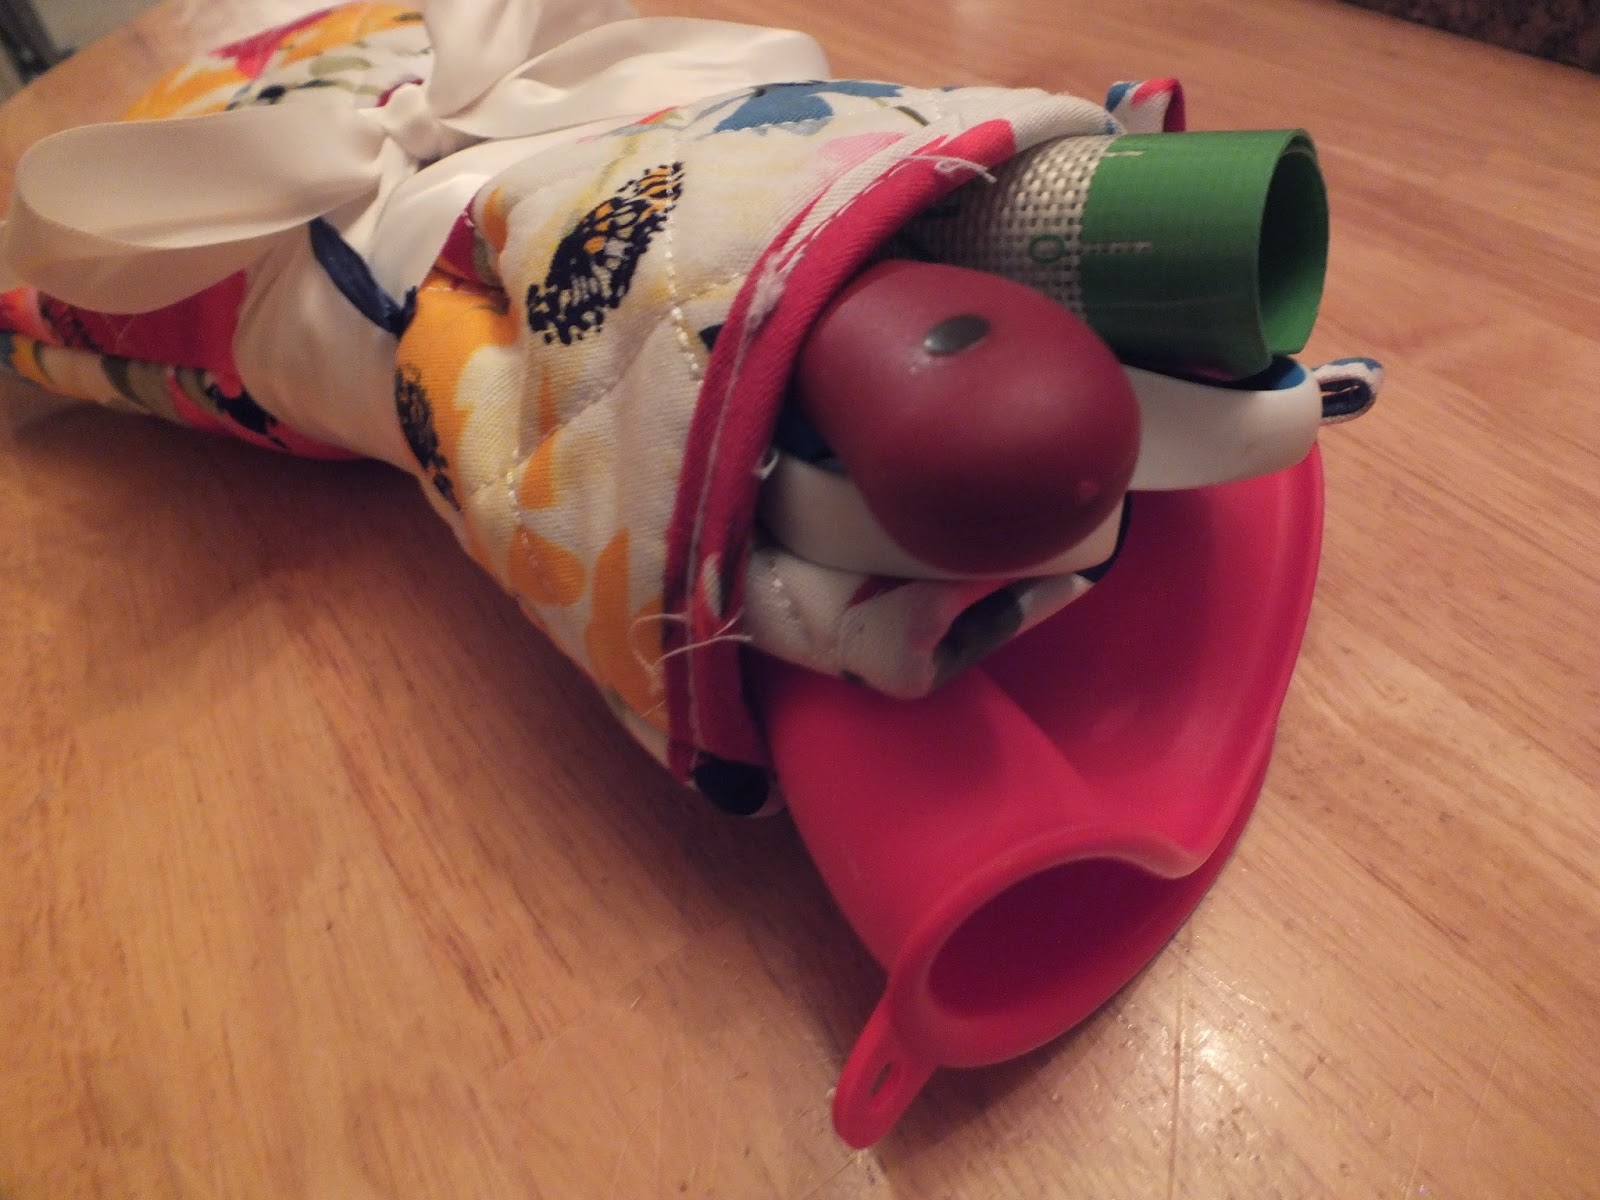
 Wednesday: spice jar filled with gum balls. I found the printable tag here. I couldn't decide what spice to put in the jars so I went with gum balls instead and it worked out okay.
 Thursday: flower pots. The flower pots are just as they come in the store because the ones I wanted to use were not large enough for the plants I ended up using. I also tied gloves on to the pot and added some rubber flowers which are actually wine glass markers. The tags are a printable I found here, with an extra phrased added to the back. The back says, "Teachers plant the seed of knowledge that will grow forever." That is really what I wanted the tag to say but could not find anything I really liked so I used the printable I found and added to it.
 Friday: candy in a bowl. The bowl is bamboo and I hope the teachers will find it useful at home. There are several different candies inside. Nerds: Thanks for making a nerd out of me. Three different fun size M&M's together: M&M (many & many) thanks for all that you do. Reese's: There are a million Reese's why you are a great teacher. York Peppermint Patty: I mint to tell you how much I appreciate you. Almond Joy: It is a joy having you as a teacher. Mounds: I had mounds of fun this year. 100 Grand: You are worth a 100 Grand.


